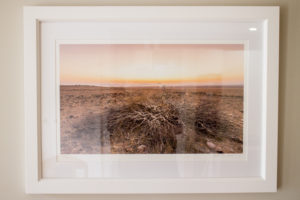
 I’m not sure about you but I always feel a bit self-conscious when exposing myself to other people, especially in public. What I have found over many years though, is that it pays to ensure you are presenting yourself in the best possible light. OK, so maybe you think I’m a bit of a pervert… but what I’m actually talking about is showing my fine art photography (so who has the dirty mind now ;-). After labouring long and hard over your masterpiece it’s worth making the effort to present it with the same care and attention you took over its creation. After all, it’s often the packaging that intimates at the value of the artwork; much like a Michelin star chef who presents his fine cuisine, not as yummy food but as a work of culinary art.
As a fine art giclée printer I get to print some really stunning artwork and as a photographer, my presentation knowledge and experience is centred mostly around my own work. Custom framing artworks for display can be an expensive exercise and may be beyond the budget of artists that are just getting going, so I have come up with a couple of presentation ideas that should suite most pockets.
Materials:
Regardless of what presentation method you choose, the quality of the materials you use will play a significant part in the appearance and longevity of your artwork. Card stock, paper and tape all contain acid which will yellow over time, contaminate your substrate and may even render your work of art worthless. As with drawing materials, always select the best possible materials you can afford for preserving your works for future generations to enjoy.
 Polly Bag and Backing:
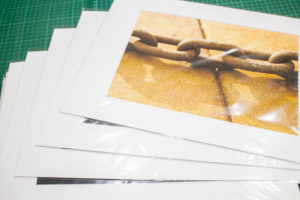
The simplest and most cost effective way of presenting your work is in a good quality re-sealable polyurethane bag with a stiff backing card. This is especially true if you are presenting your artworks at markets with loads of grubby paws flipping through display boxes. It protects the artwork and allows you to slap on an artist’s bio sticker with details of the piece. Just make sure the bags are crystal clear and of a high quality without any visual distortion.
 Matted and Backed:
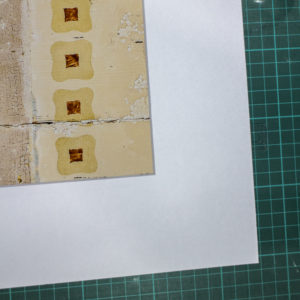
One step up from the polly bag and backing option is to have your artwork mounted in a custom matte board with foam board backing. Once again, select acid free matte board and tape to preserve the longevity of the work. Make sure that whoever does the matting for you practices conservation framing methods. The matte board will serve as a frame and with the right colour choice, focuses the attention of the viewer without distracting from the artwork. Unless your artwork has a unique dimension, the trick with matting artwork is making sure that the matte size can fit a standard frame size making it easy for the buyer to get it framed. The depth of the matte should also be appropriate to the artwork; here bigger can be better. A skinny matte border can appear cheap and not do your work any justice. If your art is on a handmade substrate or has a decal edge, floating the piece within a matte board will incorporating the edges of the paper in the presentation.
Mounted on Foam board:
This method takes a bit of planning, especially for original pieces, as you will need to allow for a border around the artwork on the page. It’s much easier done with giclée print reproductions or photographic prints where you have full control of the image placement and size on the paper. The effect is a simple and elegant presentation without any distractions. The trick with this is to ensure that the print is securely attached to the foam board backing and is best undertaken by a professional framing shop that has a vacuum mounting facility. Having said that, foam board is available in a self-adhesive option with good quality glue for the DIY enthusiasts.
 Framed and RTH:
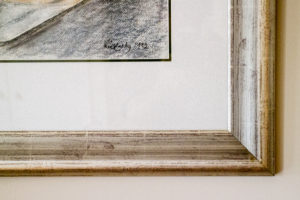
Ideally, your artwork should be professionally framed and Ready To Hang. This gives you the opportunity of selecting a frame that would best show off the piece without distracting from it. Frame mouldings can vary vastly in style and colour so it’s easy to overstep the mark; select a simple frame style in a colour that brings out the best in your work. Ornate hand-carved guilt frames are best suited to old masters works hanging in galleries and to be avoided. Simply put, your frame should enhance not overwhelm your artwork. Custom framing can be expensive but if you shop around you may find ready-made frames of good quality that fit standard paper sizes (this is the option I choose most). Steer well clear of cheap snap on or plastic frames; these will tarnish your artwork and diminish it’s value (rather go the polly bag or matte option). If your artwork requires glass protection you are faced with the choice of plain, non-reflective, acrylic or gallery quality glass each with their advantages and price points. Pay attention to the hanging components and ensure they are up to the job of supporting the weight of the framed image.
 Canvas Stretching:
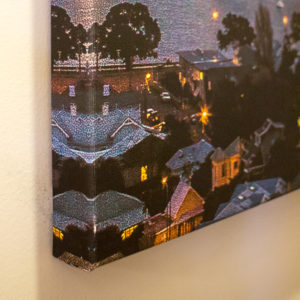
Stretched canvas artworks should be gallery wrapped and are deemed to be RTH and usually don’t require any framing; but framing is an option that can add an elegant finish. When working on canvas, make sure that you continue the image around the sides or alternately paint the sides in a neutral colour; it is a part of the artwork after all. Saw tooth hangers make it easier to hang the image and are definitely less fussy than attaching a cable. Make sure your canvas is securely stapled at the back, even if it’s purchased pre-stretched and that the staples are covered with paper tape to finish off professionally.
Your approach would differ completely if you were presenting your portfolio as a body of work to a gallery or doing a private showing for a buyer. Here you would want your work to be presented with continuity in keeping with your style as an artist.
Now go out there and expose yourself… Create – Print – Share
